Make A DIY Christmas Hamper in 7 Easy Steps
A DIY Christmas hamper is one of the most meaningful ways you can give a gift. A regular hamper is a lovely idea, but putting it together yourself really shows how much you care. The best part is that you can work within any budget—filling it with as many or as little things as you want. And when that budget is a little lower than you’d like it to be, you can always apply for a fast Christmas Loan with Swoosh.
Overview:
- Grab a container
- Pick a theme
- Source your goodies!
- Choose your filler
- Assemble your hamper
- Decorate your box
- Don’t forget a card
1. Grab a container
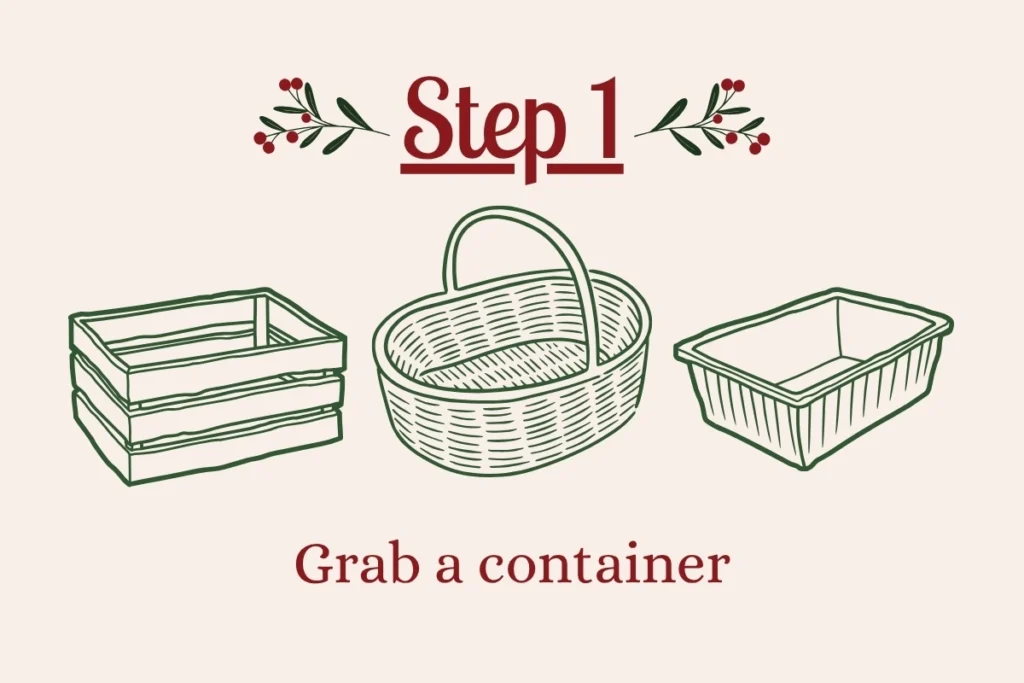
Choose a container that matches the size or amount of gifts you want to give. Do this first so that you can restrain yourself from going overboard! Also be careful not to go too big or your DIY Christmas hamper can look a little empty.
The go-to option is usually a basket, but there are plenty of containers you can use instead of a basket for a hamper. You can grab a crate, gift box, or whatever fun container you can find to place the goodies in. You can also go the practical route and choose something they can use, like a bowl, bucket or desk organiser.
Kmart, Daiso or your local dollar store should have something cheap you can use—or you might even have something laying around the house.
2. Pick a theme

Think about something your loved one wants, needs, or enjoys. Some meaningful DIY Christmas hamper ideas include:
- Self-care: face masks, body scrub, hand cream, candles, bath bombs, moisturiser
- Snacks: chocolates, lollies, mini chip packets, biscuits, your loved one’s favourite foods!
- Crafty supply kit: scrapbook paper, stickers, washi tape, stamps, other items specific to their hobby
- Cocktail or wine sets: bottles of wine or spirits, sample size spirits, glasses, cheeses, crackers, nuts, mini cheese board
- Coffee or tea lover set: mug, travel mug, coffee beans or tea leaves, coffee tin, coaster, book
- Cosy bundle: fluffy socks, DVDs, popcorn
- Collectables: Pokemon cards, comic books, figurines, plush toys
Pick a theme that is specific to the person you’re DIYing the hamper for so that they feel special and seen. Favourite snacks are definitely one of the cheaper options that you can’t go wrong with, but there are plenty of other Christmas hamper ideas on a budget. Don’t forget to think about colours and aesthetics too.
3. Source your goodies!

A DIY Christmas gift hamper can have two to a hundred items, but make sure that you aren’t wasting your precious cash on less useful, “filler” items—that’s what the filler in the next step is for! A helpful tip is to grab multipacks, sample or mini sets, or pre-made gift sets to fill up your hamper. Places like Priceline, TK Maxx, Officeworks, Kmart, and supermarkets are good for this.
Of course this is the most expensive part of the hamper, so set a budget and stick to it. Take advantage of Black Friday and Cyber Monday sales to stock up on your DIY Christmas hamper contents
.
4. Choose your filler
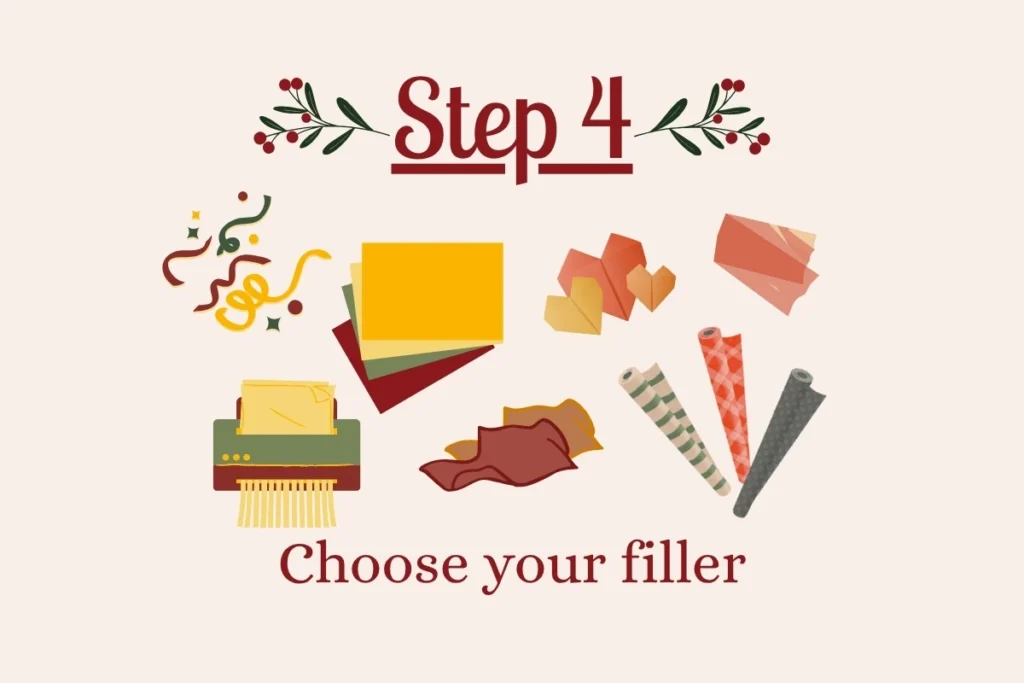
Don’t just stuff everything into a box, DIY Christmas hampers need some satisfying aesthetics too. You’ll need something to stick everything up and together, like glue tabs, tape, Blu-Tack, or any sort of adhesive that can easily be taken off.
You will also need filler for the bottom of the hamper to keep everything standing and the hamper looking full. Packing pellets, shredded paper, cellophane, or tissue paper can be used. If you want to be a little bit more creative and fun, you can even fill it with a bunch of Favourites or Celebrations.
5. Assemble the hamper
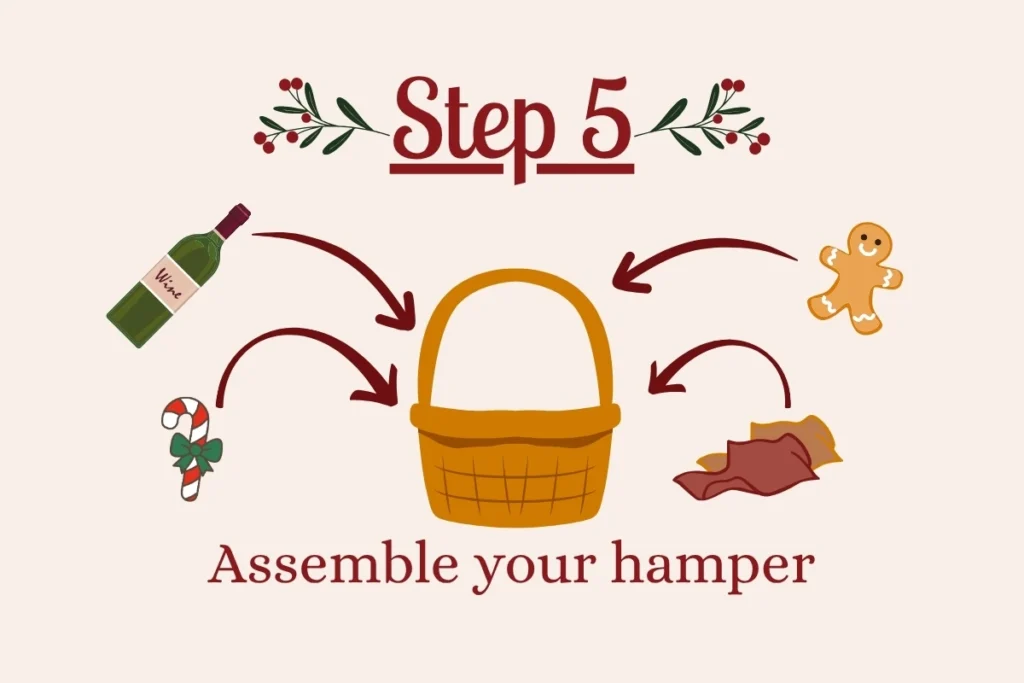
Place whatever filler you’ve chosen on the bottom of the hamper. Start planning out where everything will go. Place the tallest items at the back, bulkiest in the middle and smallest at the front. Take a moment and have a look. Does it look too uniform? Play around with angles and rearrange until it looks right. Try to vary the shapes and sizes. Remove items from their packaging if you need. The key to a DIY Christmas hamper is to not make it look DIY.
Use your glue tabs to keep everything in place. Use your filler to bulk up empty bits and give the hamper a full effect.
6. Decorate the box

You don’t have to go too crazy with decorations and wrapping, especially if you’re doing your Christmas hamper on a budget. A simple bow is enough!
If you choose to wrap your hamper, place it on top of your wrapping paper or cellophane, bring the wrapping sides above it and tie it up with string or ribbon.
7. Don’t forget a card

You can keep this part really simple with a tag, postcard or placecard with your loved one’s name on it. It just adds that extra touch of care. And there you have it, you’ve DIYed a cheap yet very thoughtful gift.
Doing a little too much DIY this Christmas?
You know what they say, time is money! If you find yourself DIYing everything to stay within your budget, Swoosh has quick Christmas Loans for when you need it most. Apply online today!